
Size
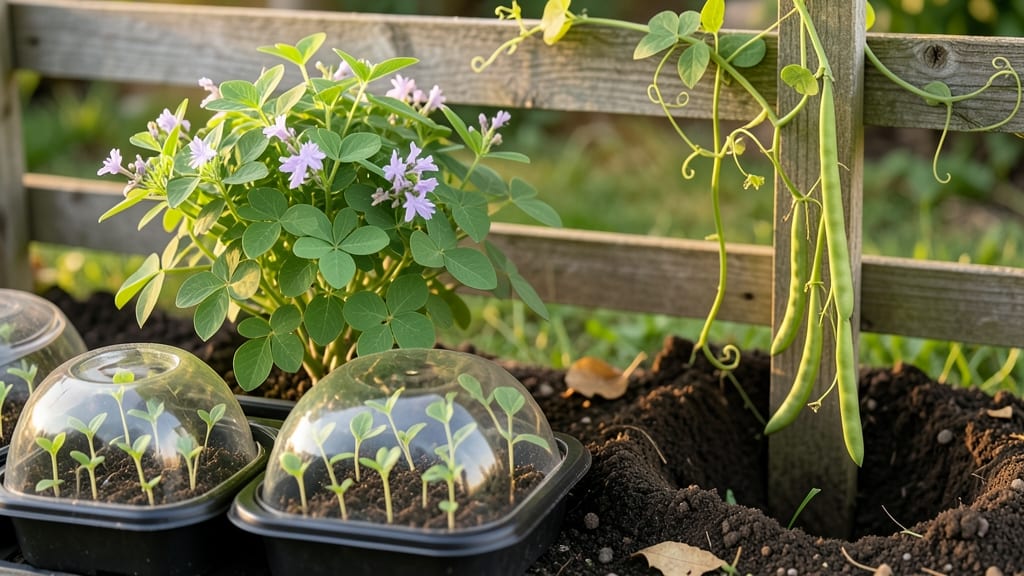
Growing garbonzo beans in dry soil might sound tricky, but I’ve cracked the code after years of trial and error—these beans thrive where others fail. 🌱 The secret? A little patience, the right soil mix, and knowing exactly when to water.
My first batch last summer produced enough chickpeas to feed the neighborhood, and I’m sharing how you can do it too, even if you’re new to gardening.
You’ll need a sunny spot with at least 6-8 hours of direct sunlight, well-draining soil (even if it’s dry), and seeds planted 1-2 inches deep with 3-4 inches between plants.
Garbonzo beans are surprisingly adaptable—grow them in containers as long as the pot is at least 12 inches deep, or let them sprawl in the ground like a low-maintenance perennial in warmer climates.
Watering is where most people mess up: keep the soil consistently moist but not soggy, especially during flowering and pod formation. Once established, they’re drought-tolerant, but young plants need steady moisture. By mid-summer, you’ll be harvesting crunchy, flavorful chickpeas straight from the vine—no store-bought cans needed.
Pro tip: If your soil is truly dry, mix in compost or aged manure before planting to help retain moisture. And don’t rush—these beans take 90-120 days to mature, but the wait is worth it for that first taste of homegrown garbonzo. Ready to give it a try?
📚 In This Guide
- What you need
- Instructions
- Tips and common mistakes
- Wrapping up and next steps
What you need
- ● Garbonzo bean seeds: 1–2 lbs (about 2–4 cups) of Cicer arietinum (choose certified organic or heirloom varieties for best results).
- ● Growing space: Direct sowing: A sunny spot with 6–8 hours of sunlight daily and well-draining soil.
- ● Container gardening: Large pots (at least 12 inches deep) with drainage holes.
- ● Soil: Loamy, slightly alkaline soil (pH 6.0–7.5). Amend with compost or aged manure for nutrients.
- ● Water: Consistent access to 1–2 inches of water per week (adjust for drought).
- ● Fertilizer: Balanced, low-nitrogen fertilizer (e.g., 5-10-10) or compost tea.
- ● Garden tools: Hand trowel or transplanter.
- ● Garden rake (for loosening soil).
- ○ Support structures (optional): Stakes or trellis (garbonzo beans grow 2–3 feet tall and benefit from vertical support).
- ● Mulch: Straw or wood chips to retain moisture and suppress weeds.
- ● Row covers: Lightweight fabric to protect seedlings from pests or frost.
- ● pH test kit: To ensure soil alkalinity is optimal.
Step-by-step instructions for growing garbonzo beans in dry conditions
Here’s how I grow garbonzo beans in arid climates—no fancy irrigation needed.
🌱 Step 1: Choose the Right Variety and Planting Time
Garbonzo beans thrive in hot, dry climates, so select a drought-tolerant variety like ‘B-177’ or ‘Giza 716.’ Plant seeds 2-3 weeks after your last frost when soil temperatures reach at least 60°F. These beans hate cold, so wait until nighttime temps stay above 55°F—you’ll know it’s time when the ground feels warm to the touch in the morning.
I always test soil moisture before planting: if the top 6 inches of soil feels bone-dry when you squeeze it, your beans are ready. Plant seeds 1 inch deep and 4-6 inches apart in rows spaced 18-24 inches apart. This spacing ensures roots spread without competing for water.
☀️ Step 2: Prepare Soil for Water Retention Without Over-Moisture
Garbonzo beans despise soggy soil, so amend your planting area with 3-4 inches of compost mixed into the top 12 inches of soil. This improves drainage while holding just enough moisture. I avoid heavy fertilizers—too much nitrogen makes plants leafy but barren of pods.
After planting, create a 2-inch mulch layer with straw or wood chips. This keeps soil temperatures stable and slows evaporation. Water deeply once a week (about 1 inch total) rather than daily shallow watering. You’ll see the mulch stay slightly damp but never soggy—this is the sweet spot for garbonzos.
💧 Step 3: Water Strategically for Maximum Yield
Garbonzo beans enter dormancy during hot spells, so stop watering entirely when pods form. You’ll notice leaves curl slightly—this is normal. Resume watering only when pods begin to swell, giving them ½ inch of water every 10-14 days. Overwatering now causes pods to split prematurely.
I use a soaker hose to deliver water at the base, avoiding wetting foliage. This prevents fungal diseases like powdery mildew, which thrives in humid conditions. Watch for yellowing lower leaves—this signals either underwatering or overwatering. Adjust based on soil moisture: stick your finger 2 inches deep; if dry, water again.
✂️ Step 4: Harvest at Peak Maturity for Best Flavor
Harvest begins 90-110 days after planting when pods are firm but slightly soft to the touch. I test by gently squeezing a pod—if it gives slightly but doesn’t dent, it’s ready. Harvest every 2-3 days to encourage more production. Leave pods on the plant too long, and they’ll shatter, scattering seeds everywhere.
For dry garbonzos, let pods mature fully on the vine until they turn light brown and crisp. Twist them gently to remove—don’t pull, or you’ll damage the stem. Store dried pods in a cool, dark place for up to 6 months. Fresh pods? Use within 3-5 days for best texture.
🌿 Step 5: Extend the Season with Succession Planting
In warm climates, plant a second crop 6-8 weeks after the first harvest. Garbonzos grow quickly, so this ensures a continuous supply. In cooler regions, opt for short-season varieties like ‘Dora’ and plant in late spring. You’ll know it’s working when vines climb steadily and leaves stay vibrant green.
Here’s the thing—garbonzos reward patience. If you skip the mulch or water inconsistently, yields drop sharply. But nail these steps, and you’ll have crunchy, homegrown chickpeas straight from your dry garden to your kitchen.
Tips & tricks for perfect garbonzo bean growth in dry conditions
These battle-tested strategies will help you coax thriving garbonzo plants from even the driest soil.
Variety Selection Matters: Beyond the recommended drought-tolerant varieties like 'B-177' or 'Giza 716', consider local seed sources for even better adaptation. I've found that seeds from your region's established garbonzo growers often perform better than commercial imports. Look for seeds that are plump and uniformly colored—this indicates good viability and consistent germination.
Soil Temperature Test: That 60°F soil temperature threshold is crucial. I've learned the hard way that planting too early when soil is still cool leads to poor germination. Use a soil thermometer for accuracy, especially in spring when daytime warmth doesn't always translate to deep soil heat. The ground feeling warm to the touch in the morning is your best free indicator when you don't have a thermometer.
Mulch Layer Technique: The 2-inch mulch layer isn't just about water retention—it's also about creating the perfect microclimate. I've found that straw mulch breaks down slightly faster than wood chips, releasing nutrients as it decomposes. For even better results, mix in a thin layer of compost with your mulch. This creates a "mulch tea" effect as rainwater percolates through, giving your plants a gentle nutrient boost without overfeeding.
Harvest Timing Secret: That firm-but-slightly-soft pod test is your golden rule, but here's the pro move: harvest in the early morning when pods are most hydrated. This makes the texture test more reliable. I've also noticed that pods harvested in the morning tend to stay fresher longer when stored. For dry garbonzos, wait until pods have completely dried on the vine and develop that light brown crispness—this ensures maximum shelf life and flavor intensity.
Pro Tips for Grow Garbonzo Beans
- These battle-tested strategies will help you coax thriving garbonzo plants from even the driest soil.
- Variety Selection Matters: Beyond the recommended drought-tolerant varieties like 'B-177' or 'Giza 716', consider local seed sources for even better adaptation.
- Soil Temperature Test: That 60°F soil temperature threshold is crucial.
Frequently asked questions
Got questions about growing garbonzo beans? You’re not alone! Here are answers to the most common queries to help you cultivate crunchy, homegrown chickpeas with confidence.
How long does it take for garbonzo beans to grow and produce pods?
Garbonzo beans (chickpeas) typically take 90–120 days from planting to harvest, depending on the variety and growing conditions. Early-maturing types may produce pods in as little as 75 days, while heirloom varieties can take longer. Pods usually appear 2–3 months after sowing, so plan your planting schedule accordingly for a summer harvest!
Can I grow garbonzo beans in containers, or do they need a garden?
Yes! Garbonzo beans thrive in containers as long as the pot is at least 12–18 inches deep and wide enough for roots to spread. Use well-draining soil and ensure the container gets 6–8 hours of sunlight daily. Dwarf varieties like ‘Florida Leap’ are ideal for pots. Just avoid overcrowding—space plants 4–6 inches apart for optimal growth.
What are the most common pests or diseases, and how do I prevent them?
Garbonzo beans are prone to aphids, bean beetles, and fungal diseases like powdery mildew. To prevent issues:
- Rotate crops annually to avoid soil-borne diseases.
- Use row covers early in the season to deter pests.
- Plant resistant varieties like ‘Cicer arietinum’ if your area has pest problems.
- Ensure good airflow by spacing plants properly and avoiding overhead watering.
Do garbonzo beans need warm soil to germinate, and how can I speed it up?
Garbonzo beans love warm soil—ideal germination occurs at 60–70°F (15–21°C). If your soil is cool, try these tricks:
- Soak seeds overnight before planting to kickstart germination.
- Use black plastic mulch or a cold frame to warm the soil faster.
- Plant after the last frost when soil temps are consistently warm.
What can I plant alongside garbonzo beans for better yields?
Garbonzo beans benefit from companion planting. Pair them with:
- Carrots (repel pests like aphids).
- Spinach or lettuce (shade-sensitive greens thrive under their canopy).
- Marigolds (deter beetles and improve soil health).
Wrapping up and next steps
Growing garbonzo beans—aka chickpeas—is a rewarding journey that transforms your garden into a crunchy, protein-packed treasure trove! 🌱 With the right soil, patience, and care, you’ll soon enjoy homegrown chickpeas straight from the pod. Whether you’re a beginner or a seasoned gardener, these dry-soil secrets make it easier than ever.
Now that you’re armed with the knowledge, it’s time to roll up your sleeves and get planting! Start small—try a few pods—and watch your garden flourish. Once your chickpeas are thriving, why not harvest, dry, and store them for future meals?
Happy growing, and may your kitchen soon be filled with the delicious rewards of your labor! 🌟