
Vegetables
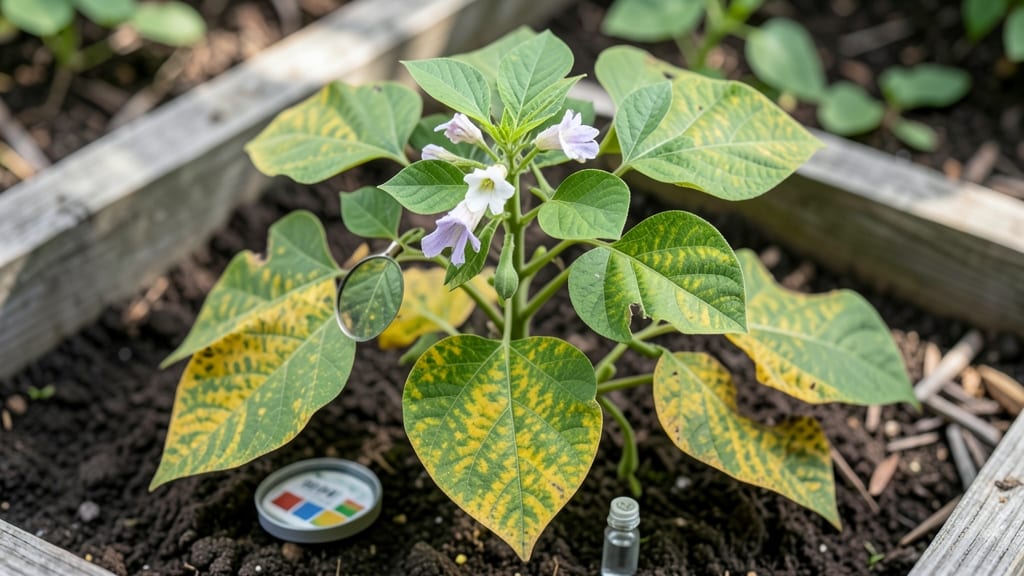
Green bean leaves turning yellow? That first sickly look can turn into a full-blown crisis if you don’t act fast. 🌱 I’ve watched my own plants go from lush to limp in just a few days—usually because I missed the early warning signs.
The good news? Most yellowing is fixable with simple checks and targeted fixes, and I’ll walk you through exactly what to look for and how to bring those leaves back to vibrant green.
Start by checking the soil moisture—yellowing often means overwatering or poor drainage. Then flip those leaves to spot hidden pests or disease spots. My go-to fix for nutrient issues is a balanced fertilizer, but sometimes it’s as simple as adjusting your watering schedule.
The key is matching the symptom to the cause, and I’ve narrowed it down to the most common culprits so you don’t waste time on guesswork.
You’ll have your plants thriving again in 7-10 days with the right approach. Imagine reaching for fresh pods from plants that look healthy instead of stressed. The best part?
These fixes work whether you’re growing in-ground, in containers, or even on a balcony. Let’s get those leaves back to their best before the problem spreads.
We’ll also cover what to do if the yellowing spreads to the stems or if you spot weird patterns—because not all yellowing is created equal. Prevention tips will keep your next harvest looking just as good. Ready to turn this around?
Hidden Triggers Behind Yellowing Leaves
Understanding why your green bean leaves are turning yellow starts with identifying the root causes—each one tells a different story about your plant’s health. From nutrient deficiencies to environmental stressors, here’s a breakdown of the most common culprits and what they reveal about your bean plants.
---
Yellowing leaves often signal a lack of essential nutrients. Green beans are heavy feeders, and when they don’t get what they need, the leaves respond with discoloration.
- 🌱 Nitrogen Deficiency (Oldest Leaves First) Nitrogen is the building block of chlorophyll, the pigment that gives leaves their green hue. When nitrogen is low, older leaves (those closest to the soil) turn yellow first, a condition called chlorosis.
This is common in fast-growing beans that deplete soil nutrients quickly. Actionable fix: Apply a balanced fertilizer (10-10-10 or higher in nitrogen) or top-dress with compost. For organic growers, use blood meal or fish emulsion.
- 💧 Magnesium or Chlorophyll Issues (Interveinal Yellowing) If yellowing appears between the veins (while veins stay green), your beans may lack magnesium or struggle with iron uptake. This is often seen in alkaline soils, where iron becomes locked away. Actionable fix: Test your soil pH (ideal: 6.0–7.0 for beans).
If alkaline, amend with sulfur or use chelated iron supplements. Epsom salt (magnesium sulfate) can also help—dissolve 1 tbsp per gallon of water and spray foliarly.
- 🍃 Potassium or Calcium Weakness (Edge Browning + Yellow) Yellowing paired with crispy edges or blotchy spots suggests potassium or calcium deficiency. Potassium regulates water and nutrient transport, while calcium strengthens cell walls. Actionable fix: Use a potassium-rich fertilizer like greensand or wood ash.
For calcium, apply crushed eggshells or lime (if soil is acidic).
---
Yellow leaves can also scream, “I’m drowning!” Green beans hate soggy roots, which lead to root rot and nutrient starvation.
- 💦 Root Rot from Excess Moisture Overwatering or compacted soil cuts off oxygen to roots, causing them to rot.
Yellowing starts at the bottom leaves and spreads upward as the plant struggles to absorb water and nutrients. Actionable fix: Let the top 1–2 inches of soil dry out between waterings. Improve drainage by mixing in perlite or sand, and ensure pots have drainage holes.
If root rot is severe, transplant to fresh, well-draining soil.
- 🌧️ Waterlogged Soil in Containers Containers without proper drainage trap water, accelerating root rot. Yellowing leaves may also wilt slightly or feel mushy to the touch. Actionable fix: Repot in a container with drainage holes and a fast-draining mix (50% potting soil, 30% perlite, 20% compost).
Avoid watering until the topsoil is dry.
---
Tiny invaders or pathogens can suck the life out of your beans, causing yellowing as they feed or infect the plant.
- 🐜 Aphids, Spider Mites, or Whiteflies These sap-sucking pests weaken leaves, causing them to yellow, curl, or develop sticky residue (aphid honeydew).
Infestations often start on the undersides of leaves. Actionable fix: Blast off pests with a strong spray of water or use insecticidal soap (1 tsp per quart of water). Introduce beneficial insects like ladybugs for long-term control.
- 🍄 Fungal Infections (Powdery Mildew or Rust) Fungal diseases thrive in humid, poorly ventilated conditions. Yellowing may appear as pale patches (powdery mildew) or orange pustules (rust) on leaf surfaces. Actionable fix: Improve airflow by pruning nearby plants or spacing beans farther apart.
Apply neem oil or copper fungicide preventatively. Remove and destroy infected leaves immediately.
- 🐛 Cutworms or Slugs: Nighttime Leaf Munchers These pests chew holes in leaves, leading to yellowing as the plant loses tissue. Look for ragged edges or silver slime trails (slugs). Actionable fix: Set up beer traps (bury a cup filled with beer) or use diatomaceous earth around the base.
Handpick cutworms at night with a flashlight.
---
Green beans are sensitive to extreme conditions, and sudden changes can trigger yellowing as a stress response.
- ☀️ Heat Stress or Sunburn Intense midday sun (especially in hot climates) can scorch leaves, causing yellow or brown patches, particularly on exposed leaves.
This is common in young plants or those transplanted without acclimation. Actionable fix: Provide afternoon shade with a shade cloth (30–50%) or move containers to a spot with dappled light. Mulch soil to keep roots cool.
- ❄️ Cold or Frost Damage Yellowing after a hard frost or cold snap is a sign of cell damage.
Leaves may also feel mushy or develop dark spots. Actionable fix: Protect plants with row covers or move containers to a sheltered area before temperatures drop below 40°F (4°C). Avoid watering before frost, as ice can further damage leaves.
- ⚡ Transplant Shock or Improper Handling Rough handling (e.g., bending stems or disturbing roots) during transplanting can cause stress-induced yellowing. This often appears as generalized yellowing without other symptoms. Actionable fix: Harden off seedlings before transplanting (acclimate to outdoor conditions over 5–7 days).
Water thoroughly after transplanting and avoid fertilizing for 1–2 weeks to reduce stress.
--- Soil pH affects nutrient availability. If the pH is too high (alkaline) or too low (acidic), essential minerals like iron, manganese, or zinc become inaccessible, leading to yellowing.
- 📉 Alkaline Soil (pH > 7.0) Common in areas with limestone or chalky soil, alkaline conditions lock out iron and manganese, causing interveinal chlorosis (yellowing between veins). Actionable fix: Lower pH with elemental sulfur (apply 1 lb per 100 sq ft) or peat moss.
Use chelated iron supplements for quick results.
- 📈 Acidic Soil (pH < 5.5) While beans tolerate slightly acidic soil, extreme acidity can leach nutrients like calcium and magnesium, leading to yellowing and poor growth. Actionable fix: Raise pH with lime (calcium carbonate) or wood ash. Test soil annually to monitor changes.
--- Not all yellowing is a cause for alarm—some leaves simply reach the end of their life cycle. Older leaves on green bean plants naturally yellow and drop as the plant redirects energy to new growth.
- 🍂 Bottom Leaves Yellowing First If only the lowest leaves are yellowing while the rest of the plant looks healthy, this is likely senescence (natural aging). The plant is prioritizing energy for pods and younger leaves. Actionable fix: Remove yellowed leaves to redirect nutrients to productive growth.
Monitor for spread—if yellowing moves upward, investigate other causes.
--- 💡 Pro Tip: Keep a plant journal to track when yellowing starts, which leaves are affected, and any recent changes (watering, fertilizing, pests). This helps pinpoint the exact cause faster!
Revive Your Green Beans Now
Yellowing leaves on your green beans? Don’t panic—most causes have simple, science-backed fixes. Below, we’ll tackle each issue head-on with clear steps, prevention tips, and a few pro tricks to keep your plants thriving.
---
Fix: Adjust your watering routine and improve soil aeration.
1. Let the Soil Dry Slightly 🌱 - Stick your finger 1–2 inches into the soil. If it’s soggy, hold off on watering.
Green beans prefer consistently moist (not waterlogged) soil. - Water deeply 2–3 times per week, depending on climate, and always in the morning to reduce fungal risks.
2. Upgrade Your Containers or Beds 🏺 - If growing in pots, ensure they have drainage holes. Add a layer of gravel or perlite at the bottom to prevent root rot. - For in-ground plants, amend heavy clay soil with compost or sand to improve drainage.
3. Check for Root Rot 🔍 - Gently pull a plant and inspect the roots. If they’re mushy or black, trim the damaged parts and repot in fresh, dry soil. - Prevention tip: Avoid watering from above—use a drip irrigation system or water at the base.
---
Fix: Provide shade and optimize growing conditions.
1. Adjust Sun Exposure 🌿 - Green beans thrive in full sun (6–8 hours/day), but afternoon shade (especially in hot climates) prevents leaf scorch. - Use lightweight shade cloth (30–50%) if temperatures exceed 90°F (32°C).
2. Mulch to Retain Moisture 🌡️ - Spread 2–3 inches of straw or wood chips around plants to keep roots cool and hydrated. - Pro tip: Mulch also suppresses weeds, reducing competition for nutrients.
3. Water Strategically 💦 - In extreme heat, water in the early morning and evening to reduce evaporation. - Consider soaker hoses for slow, deep hydration.
---
Fix: Feed your plants the right nutrients.
#### 🟢 Nitrogen Deficiency (Pale Yellow, Stunted Growth) - Solution: Apply a balanced fertilizer (10-10-10) or compost tea. - Quick fix: Use fish emulsion or blood meal for a nitrogen boost. - Prevention: Side-dress plants with well-rotted manure every 3–4 weeks.
#### 🟡 Magnesium Deficiency (Yellowing Between Veins) - Solution: Sprinkle Epsom salt (1 tbsp per gallon of water) and water at the base. - Prevention: Add dolomitic lime to soil annually for long-term magnesium.
#### 🔴 Iron Deficiency (Yellow Leaves with Green Veins) - Solution: Use an iron chelate spray or ferrous sulfate (follow package instructions). - Prevention: Maintain slightly acidic soil (pH 6.0–7.0)—test with a soil kit.
--- Fix: Remove pests and restore plant health.
1. Inspect Leaves Daily 🔎 - Look for tiny bugs, webbing, or chewed edges. Common culprits: - Aphids (sticky residue) - Spider mites (fine webbing) - Mexican bean beetles (skeletonized leaves)
2. Blast Them Off 💦 - Strong spray of water dislodges many pests. - For stubborn infestations, use neem oil spray (mix 1 tbsp neem oil + 1 tsp mild soap per quart of water).
3. Encourage Beneficial Insects 🐞 - Plant marigolds or basil nearby to attract ladybugs and lacewings, which eat pests. - Prevention: Use row covers early in the season to block beetles.
--- Fix: Improve airflow and treat infections early.
1. Prune Affected Leaves ⚔️ - Remove yellow, spotted, or wilting leaves immediately to stop spread. - Dispose of them in the trash (not compost)—don’t let spores linger.
2. Boost Air Circulation 🌬️ - Space plants 12–18 inches apart and stake or trellis bush beans to improve airflow. - Avoid overhead watering—use drip irrigation instead.
3. Apply Fungicide 🛡️ - For powdery mildew or rust, spray with baking soda mix (1 tsp baking soda + 1 quart water + few drops of soap). - For bacterial infections, use copper fungicide (follow label).
--- To keep your green beans lush and green: ✅ Test soil pH (aim for 6.0–7.0)—amend with lime or sulfur if needed. ✅ Rotate crops—don’t plant beans in the same spot yearly. ✅ Harvest regularly—overripe pods stress the plant. ✅ Monitor weather—protect from frost or sudden heatwaves.
--- 💡 Pro Tip: Keep a plant journal! Note watering, fertilizing, and pest events to spot patterns and adjust care next season.
Frequently asked questions
Why are the youngest leaves turning yellow instead of the oldest ones?
This pattern usually indicates a magnesium or calcium deficiency, or it could signal over-fertilization with nitrogen. Young leaves show symptoms first when the plant can't transport nutrients properly. Test your soil pH—if it's above 7.0, iron and magnesium become unavailable. Try foliar spraying with Epsom salt (1 tbsp per gallon of water) for magnesium or use crushed eggshells for calcium.
Can I still harvest pods from plants with yellow leaves?
Yes, but only if the yellowing is limited to a few bottom leaves (natural aging) or one side (pest damage). Avoid harvesting from plants showing systemic yellowing (spreading upward) or mushy stems, as this may indicate disease or severe nutrient deficiency. Focus on healthy plants first to avoid spreading potential issues.
How do I tell if yellowing is from overwatering vs. underwatering?
Check the soil and leaf texture: Overwatering causes yellowing from bottom-up, mushy leaves, and root rot (black, smelly roots). Underwatering shows as crispy yellow edges, wilted leaves, and dry soil 1+ inches deep. Stick your finger in—if it's bone-dry, you're underwatering; if soggy, you're overdoing it.
Will yellow leaves grow back green if I fix the problem?
Mild cases often recover! If the yellowing is from nutrient deficiency or pests, new growth will emerge green within 7-14 days with proper care. However, severely damaged leaves won't revert—remove them to redirect energy. Focus on preventing spread to younger leaves by addressing the root cause immediately.
Can I use coffee grounds to fix yellowing leaves?
Coffee grounds can help with nitrogen deficiency (they're high in nitrogen), but use them carefully. Mix 1/4 cup per plant into the top inch of soil—too much can make soil acidic and lock out other nutrients. For best results, pair with compost and monitor pH. Avoid using fresh grounds directly on leaves (they can burn foliage).