
Pruning
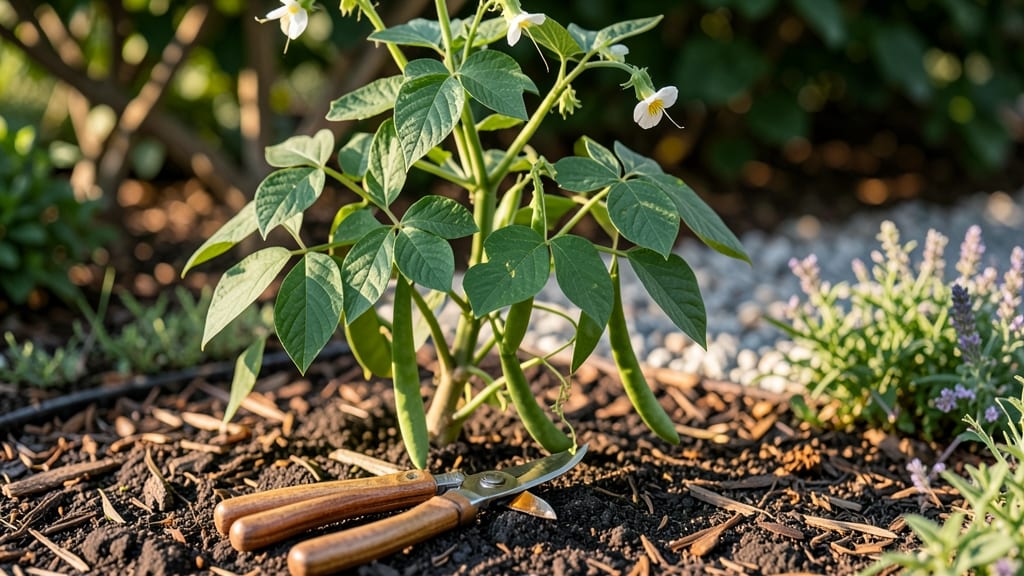
Pruning bean plants turns a single harvest into a steady supply all season long. 🌱 I learned the hard way that skipping this step means fewer pods and more disease—until I started pruning my pole beans every two weeks.
The key is timing: do it during active growth, never at flowering or fruiting stages.
You only need two tools: sharp pruning shears and a small bucket for trimmings. For bush beans, focus on removing yellowed leaves and spent flowers—this keeps energy flowing to new pods.
Pole beans need more attention: trim back leggy vines to encourage bushier growth and better air circulation, which cuts down on pests.
By mid-summer, you’ll see the difference: plants stay compact, produce continuously, and resist common diseases like powdery mildew. My green beans now give me 3-4 harvests instead of just one, and the pods stay crisp and tender longer.
Works for both bush and pole varieties, from dwarf snap beans to giant yard-long beans. The same principles apply whether you’re growing in containers or a full garden bed—just adjust the pruning frequency based on how fast your plants grow.
📚 In This Guide
- What you need
- Instructions
- Tips and common mistakes
- Wrapping up and next steps
What you need
- ● Pruning shears or scissors – Sharp, clean, and disinfected (70% isopropyl alcohol works great). Avoid dull tools to prevent crushing stems.
- ● Gloves – A pair of gardening gloves (nitrile or leather) to protect your hands from thorns (especially on pole beans) and dirt.
- ● Garden twine or soft plant ties – 3–5 feet per plant (for pole beans) to support vertical growth after pruning.
- ● Compost or mulch – A 1–2 inch layer to replenish soil nutrients post-pruning.
- ● Watering can or hose with a gentle nozzle – For hydrating plants after trimming.
- ● Plant support stakes or trellis – 6–8 feet tall for pole beans if you’re not using existing structures.
- ● Fertilizer (balanced or nitrogen-rich) – A low-dose (5–10–10 or similar) to boost recovery after pruning.
- ○ Pruning sealant – Optional for large cuts (like on mature pole beans) to prevent disease entry.
- ● Notebook or app – To track pruning dates, plant growth stages, and harvest progress!
Step-by-Step instructions for pruning bean plants
Here's how to keep your beans producing all season long—whether you're growing bush or pole varieties.
✂️ Step 1: Identify and Remove Dead or Diseased Growth
Start by inspecting each plant for any stems, leaves, or pods that look brown, yellowed, or mushy. These are dead or diseased and need immediate removal. Use clean, sharp pruning shears to cut just above a healthy leaf node—this prevents disease from spreading to other parts of the plant.
I always prune in the early morning when plants are dry. Wet leaves can harbor fungal spores, and cutting them then risks spreading problems. You'll know you're doing it right when you see fresh green tissue exposed after each cut.
🌿 Step 2: Prune Bush Beans for Airflow and Light
For bush beans, focus on maintaining an open structure. Remove any stems that cross over others, creating a dense canopy. This ensures better airflow and reduces humidity around the leaves, which prevents common fungal diseases like rust and powdery mildew.
Pinch off the top set of leaves when the plant reaches about 12-18 inches tall. This encourages bushier growth and more side branches where pods will form. You'll notice new shoots emerging from the leaf axils within a week—these are your future pod-producing stems.
🌱 Step 3: Train Pole Beans Up Their Supports
Pole beans need regular guidance to climb their trellis or stake. Gently weave the main stem through the support structure, securing it with soft plant ties if needed. Remove any side shoots that grow downward or away from the main stem—these compete for energy and reduce pod production.
Every 4-6 inches of vertical growth, pinch off the growing tip of the main stem. This triggers the plant to produce more lateral branches, each of which will bear multiple pods. Watch for new side branches forming within 5-7 days—these are your high-yield zones.
⏰ Step 4: Harvest and Prune for Continuous Production
When pods reach 4-6 inches long (depending on variety), harvest them immediately. This not only gives you fresh beans but also signals the plant to produce more flowers and pods. After harvesting, check the stem for any spent blossoms and remove them—this redirects the plant's energy toward new growth.
For both bush and pole beans, I like to prune lightly after each harvest. Simply trim back any leggy growth or overcrowded stems to maintain the plant's shape. You'll see a surge in new flower production within 3-5 days, leading to another round of pods.
☀️ Step 5: Adjust Pruning for Seasonal Changes
As summer progresses, reduce pruning frequency but keep an eye out for any aggressive growth that might shade the lower parts of the plant. In late summer, when days grow shorter, focus on removing only the most vigorous new shoots—this helps the plant conserve energy for next year.
If you're growing in a cooler climate, prune more aggressively in early fall to harden off the plants. Remove all pods and flowers about 6 weeks before your first frost—this forces the plant to redirect its energy into root and stem development for winter survival.
Tips & tricks for pruning bean plants like a pro
Pruning bean plants isn't just about cutting back—it's about extending your harvest season and keeping your plants healthy. Here's what I've learned after years of growing both bush and pole varieties.
Timing Secret: Early morning is your best friend for pruning. The plants are dry, which reduces the risk of fungal spores spreading when you make cuts. I've seen firsthand how wet leaves can turn a simple pruning session into a disease spreader—always wait until dew has dried completely.
Visual Cues for Healthy Cuts: When you're removing dead or diseased growth in Step 1, look for fresh green tissue just below where you're cutting. This is your signal that you're cutting at the right spot—right above a healthy leaf node. If you see brown or mushy areas, you're still in the diseased part and need to cut further back.
Growth Hack for Pole Beans: The 4-6 inch rule for pinching pole beans works wonders, but here's the trick: use your thumb and forefinger to gently squeeze the stem just above a leaf node. The stem will snap cleanly, and you'll avoid tearing the plant. This also prevents ragged cuts that can invite pests and diseases.
Seasonal Adjustment: In late summer, when days shorten, I focus on removing only the most vigorous new shoots. This helps the plant conserve energy for next year's growth. If you're in a cooler climate, start this aggressive pruning about 6 weeks before your first frost—this gives the plant time to redirect its energy into stronger roots and stems.
Pro Tips for Prune Bean Plants
- Pruning bean plants isn't just about cutting back—it's about extending your harvest season and keeping your plants healthy.
- Timing Secret: Early morning is your best friend for pruning.
- Visual Cues for Healthy Cuts: When you're removing dead or diseased growth in Step 1, look for fresh green tissue just below where you're cutting.
Frequently asked questions
Got questions about pruning bean plants? You’re not alone! Here are some of the most common concerns—and straightforward answers—to help you keep your harvest thriving.
When is the best time to prune bean plants?
Prune pole beans regularly throughout the growing season—every 2–3 weeks—to encourage more pods and better airflow. For bush beans, prune only to remove yellowing leaves or damaged stems. Avoid heavy pruning during flowering or podding, as this can reduce yields. Early morning is ideal to minimize stress on the plant.
Can I prune bean plants too much?
Yes! Over-pruning—especially during peak production—can stress the plant and reduce harvests. Stick to removing no more than 1/3 of the plant’s foliage at once. Focus on dead, diseased, or overcrowded branches. Pole beans are more forgiving, while bush beans should be pruned minimally to avoid stunting growth.
What should I do with pruned bean plant leaves?
Don’t toss those clippings! Small amounts of fresh leaves can be composted or used as mulch. However, avoid composting large quantities or diseased leaves—opt for the trash instead. If you’re feeling adventurous, young, tender leaves (like those from green bean varieties) can even be cooked and eaten (blanched and sautéed like spinach!).
How do I prune beans for a longer harvest season?
For extended harvests, prune pole beans aggressively early in the season to boost vertical growth, then taper off as pods form. For bush beans, remove older pods (especially those turning brown) to redirect energy to newer ones. Succession planting—sowing new seeds every 2–3 weeks—also extends your harvest window naturally.
My beans have pests after pruning. Did I do something wrong?
Not necessarily! Pruning can sometimes expose hidden pests, but it’s not the cause. Focus on prevention: Use row covers early, handpick pests like aphids, or spray with neem oil. Healthy plants with good airflow (thanks to pruning!) are less attractive to pests. If infestations persist, rotate crops next season to break pest cycles.
Wrapping up and next steps
Pruning your bean plants is the secret to a bountiful, year-round harvest—whether you’re growing bushy or climbing varieties!
By following the right techniques, you’ll boost airflow, prevent pests, and keep your plants producing like champions. 🌱 With the tools and tips you’ve learned, you’re now ready to transform your garden into a thriving, low-maintenance bean paradise.
Ready to take action? Start small—pick one or two plants to prune this week, and watch the difference in just a few days. Soon, you’ll be enjoying fresh, homegrown beans straight from your garden! Happy pruning! 🌟